Call Us: 604.856.4799
Request A Quote

“My house flooded and my floors are damaged. What happens next?”

Flood damage

Water is the nemesis of flooring. While some flooring (vinyl for example) can hold up better against water than others, most need to be replaced after a flood. Once the insurance company has been called and a restoration company is on their way, many customers still have questions. Most of our customers have (thankfully) never been through a flood before and aren’t familiar with the insurance restoration process. Having answers to your questions and a guide on what is next to come helps to bring much needed peace of mind in this less than desirable situation.

Though we cannot speak to the whole claim process, we can provide some insight about  how the flooring portion of your claim works.

The Process

  1. A restoration contractor comes out to assess the damages. This restoration company can be one recommended by your insurance or one you chose.
  2. The restoration contractor writes a scope and gets their recommended flooring companies to come to your home.
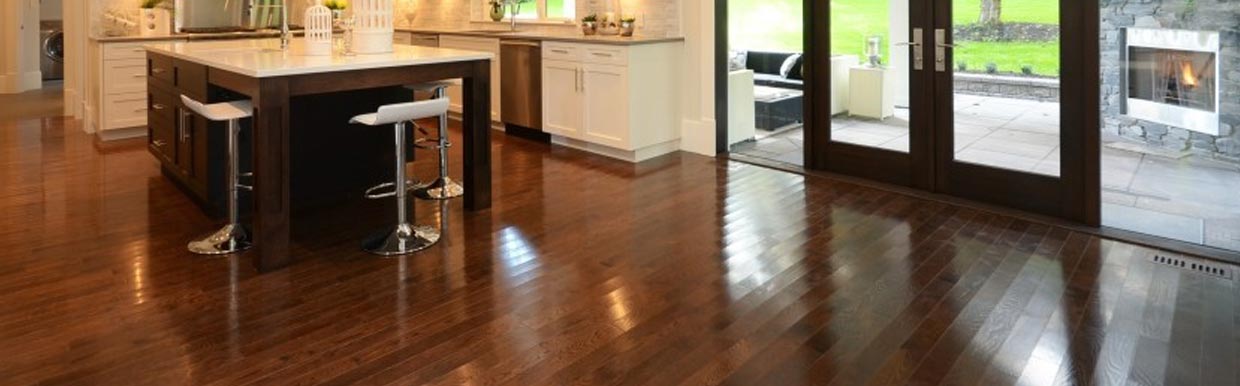
  3.  The flooring company measures the affected areas and takes samples of the existing flooring.
  4. A like kind and quality product is determined. The method used to determine like, kind and quality varies based on the insurance adjuster’s request but we most often send our samples to an independent flooring lab that recommends a like kind and quality replacement product and value.
  5. The flooring companies send a quote to the restoration contractor. Once received, the restoration contractor sends the flooring quote as part of the larger repair scope quote to the insurance adjuster. The insurance adjuster reviews the quotes they received (often from multiple companies) and approves one.
  6. Once a quote is approved, the flooring contractor receives an instruction to go ahead with product selection.
This is just the general process followed in most of the insurance claims we have done flooring for. Some steps may vary depending on your restoration company.

Choosing product: I want a similar product

Your flooring company will bring out samples to your home or invite you to take a look at their showroom. The samples shown are the ones recommended by the lab or other products that are similar in quality and price. With thousands of flooring options out on the market and a constant turnover of products to accommodate new trends, no flooring company can guarantee they will find an exact match to your original flooring but we will certainly try! If you still have them, providing receipts from the original flooring purchase can be helpful for finding the same product.

Choosing product: I want something different

Since the existing flooring is being removed, many home owners use the repairs as an opportunity to switch out their current flooring for something new. At MIRA, we will ask a couple of questions about what you’re looking for and find products meet that criteria. We can either bring samples to your home or invite you to our showroom to view a wider selection of options.

Once you have picked your samples, we will work out the upgrade cost for you. Depending on the complexity of the upgrade, we will either work out the price on the spot or email you the upgrade quote at a later date. Replacing your vinyl and carpet with tile and hardwood will often require a full upgrade quote, while the cost difference of choosing a higher priced carpet than your original carpet can be calculated in your home. We determine your upgrade amount by calculating the price of the product and installation, minus the amount covered by insurance. Often this amounts to one lump-sum total but we are more than happy to explain each of the costs to you, line by line if requested.

Do you have further questions about the insurance restoration process? Let us know in the comments!

MIRA Wine Review: Local Winery Visit

For the Spring 2014 reviews, we decided to take the wine reviews on the road to Chaberton Estate Winery. The MIRA Floors team took a day trip out to the winery located in heart of the picturesque farmland of South Langley.

Chaberton Estate Winery

Before the tour we stopped by the Bacchus Bistro, the onsite French restaurant overlooking the vineyards. As expected, the staff were professional with great suggestions on wines that paired nicely with our chosen meals. Some of the MIRA team favourite were the braised lamb shank and the duck leg confit.


We took a tour of the vineyards and winery to view the process of creating wine from the vines to bottles. The barrels the wine is aged in are made of French oak – more dense than North American oak and only used a maximum of three times. Some enterprising winemakers have recognized that the dense French oak would be good for flooring and have turned the used wine barrels into flooring.  Each wine barrel holds an impressive 225L of wine or 300 bottles worth. The chalkboard pictured below is a diagram of each wine that goes in each barrel. Since wine evaporates over time, the winemaker needs to keep track of the barrel’s for refills.

Chaberton Estate Winery Tour

Chaberton wine tasting

After the tour, we moved to the tasting room to taste four wines. The tasting contenders were:

Chaberton 2012 Valley Chardonnay

This unoaked Chardonnay greets you with a refreshing aroma of lemon peel, pear and citrus fruits and provides complimentary flavours of green apple, lemon and nectarine for the palate. Enjoy this dry white on its own or try it with a goat cheese salad, creamy pasta or fresh seafood.

Chaberton Reserve 2012 Bacchus

Named after the wine god from Greece, this delectable white wine is made from estate grown grapes. The Bacchus grape is hybrid grape, created by cross-breeding three different grapes. Its taste is a bit sweeter, since it is related to Riesling grapes. This off-dry wines features palate pleasing flavours of citrus, nectarines and apricots.

Chaberton  2012 Valley Gamay

This lighter wine is a blend of Gamay Noir grapes from the Okanagan. It offers flavours fruity flavours such as strawberry jam with a bit of sweet spice and vanilla notes. Pair this wine with a meal of barbequed salmon, creamy cheses, and tapas.

Chaberton Reserve 2011 Meritage

The name “Meritage” is portmanteau of the words “merit” and “heritage”. The grapes are a blend of merlot, Cabernet Franc and Cabernet Sauvignon selected from the Okanagan and Similkameen Valley. The nose is strong with scents of black currant, cedar and cassis and brings flavours of blackberries and peppers. This blend is best enjoyed with red meats, duck and hard cheeses.

White wine ready for tasting

Hardwood installation types

Hardwood installation types

You have found the perfect hardwood and and now it is time to install. The installation method to use is mostly determined by the hardwood flooring selected. There are three main hardwood installation types – each with it’s own pros and cons to consider.

Nail down

For a nail down installation, the flooring is affixed to the subfloor using nails or flooring cleats. Nail down installations cannot be done with a concrete subfloor – only with a wood subfloor. This installation method is a popular for solid hardwood floors. It is not recommended for condos where noise from walking on hardwood is a concern as the noise will travel through the nails to the suite below.

Glue-down

For this installation type, a speciality adhesive is spread with a trowel to glue the hardwood to the subfloor. Your flooring professional will recommend the best adhesive to use for your floor. This installation type is often used with engineered flooring or parquet. It is not recommended for solid hardwoods.

Floating

As the name implies, floating hardwood is not attached to the subfloor. Instead the hardwood floats on top of the subfloor. Floating floor installations require a underpad to be placed on top of the subfloor before installation.

There are two types of floating installation: tongue & groove and click. For a floating tongue and groove installation, a recommended adhesive is applied to the tongue and groove of the floor board to hold the boards together. A click system on the other hand, doesn’t use adhesive. The manufacturer’s patented click system allows the boards to stay together.

If you are still unsure which hardwood installation type is most suitable for your hardwood, your flooring professional can advise you on the best installation method.

Try on a Floor – Review of Shaw’s Virtual Flooring

It can be challenging to visualize how your new floors will look in a room from just a flooring sample. Shaw’s “Try on a Floor” online virtual flooring tool eliminates the guesswork by letting you try on flooring in your own room! We gave it a try with a room in our office and a few job photos. Here’s a few tips and tricks to make the most of this great online tool.

How to take the photo

To get the best photo of your room Shaw recommends the following:

1. Move plants, decorative items and area rugs out of the shot. Avoid mirrors that reflect the floor. (We learnt this lesson the hard way – see if you can spot it!)

2. Take the photo during the day with natural light behind you and lights on to avoid shadows.

3. Set your camera’s resolution on high to ensure a sharp image. (We took photos of the MIRA office with an iPhone 5 and they worked well!)


Upload photos to Shaw

1. To upload photos to “Try on a Floor”, you’ll have to become a member first. Create a new account with your email address or login with Facebook here: https://shawfloors.com/hub/login.aspx

2. Once registered, go to the photo uploader here: http://shawfloors.com/tryonafloor.aspx?mode=uyo. Shaw has a great video demonstration to show how to upload your photos and prepare your floor.

Prepare your floor

1. Define your floor. We recommend doing a quick outline with the Add Area tool. Then zoom in to the photo and do touch-ups with the erase and add area brushes.

2. Create a grid by drawing a line from the one end of the farthest baseboard to another end. Align your floor by adjusting the grid’s rotation and tilt.

3. Change the scale of the grid to match the scale of your room.

Your photo is now ready to try on new flooring options! The process looks confusing but it is very simple. The three steps only took us about three minutes for the office photo and 5 minutes for each of the job site photos.

Here’s a before and after of our showroom. Goodbye commercial carpet, hello hardwood floors! (Hardwood style Lewis and Clark, Colour Pacific)

We also tried a few before and after’s with some photos from a recent new build job.

The carpet in this bedroom was replaced with a trendy white oak visual laminate. (Laminate style Cantebury, colour Thyme)

Bedroom original

Bedroom laminate

We swapped out the dining room hardwood with a bold patterned carpet. (Carpet style Caldonia, colour Sesame)

Dining room original

Dining room carpet

Don’t have a camera or time to upload a photo? You can use one of Shaw’s pre-made room scenes instead. You can change the colour of the walls and furniture of the pre-made room scenes to look more similar to your own home.


MIRA Floors Leadership Change

James Alisch will be ceasing his involvement in day-to-day sales operations at MIRA Floors & Interiors as of January 31, 2014. He will remain a silent co-owner of the company.

“I’m proud of everything the MIRA team has accomplished since I started here five years ago,” said James Alisch. “Together we have achieved tremendous growth – 272% from 2008-2013. Given the current strong, cohesive team and dedication to providing an exceptional customer service experience, I am excited for a future of continued success at MIRA.”

“We thank James for his commitment to MIRA over the years. His leadership of the sales team and commitment to growth was appreciated.” said Kevin Bergstresser, co-owner of MIRA Floors & Interiors. “The ownership team had been planning this transition since early Fall 2013 and decided that the start of the new year was best time for this change. We wish him the best in his future endeavours outside of the flooring industry and are excited to have him still involved as a partner.”

Business will continue as usual at MIRA Floors & Interiors. Co-owners Kevin Bergstresser and Lyndon Friesen will continue managing day-to-day operations. To ease the transition, other members of the sales team will be following up with customers about any upcoming projects, jobs in production or any other outstanding requests.

If you have any questions about this leadership change, please contact the MIRA office at 604.856.4799.

« Previous Page  Next Page »
WCFA ICC Greater Langley Chamber of Commerce Insurance Brokers Association CHOA Greater Vancouver Home Builders Association Better Business Bureau BCAOMA Aviva