Call Us: 604.856.4799
Request A Quote

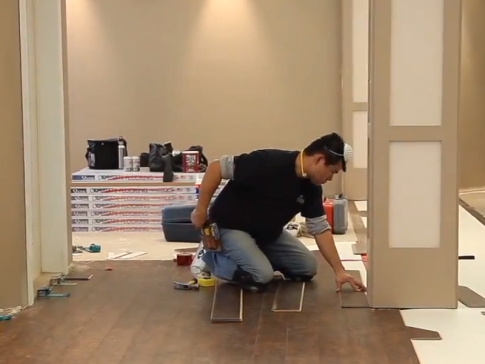
Hardwood installation types

Hardwood installation types

You have found the perfect hardwood and and now it is time to install. The installation method to use is mostly determined by the hardwood flooring selected. There are three main hardwood installation types – each with it’s own pros and cons to consider.

Nail down

For a nail down installation, the flooring is affixed to the subfloor using nails or flooring cleats. Nail down installations cannot be done with a concrete subfloor – only with a wood subfloor. This installation method is a popular for solid hardwood floors. It is not recommended for condos where noise from walking on hardwood is a concern as the noise will travel through the nails to the suite below.

Glue-down

For this installation type, a speciality adhesive is spread with a trowel to glue the hardwood to the subfloor. Your flooring professional will recommend the best adhesive to use for your floor. This installation type is often used with engineered flooring or parquet. It is not recommended for solid hardwoods.

Floating

As the name implies, floating hardwood is not attached to the subfloor. Instead the hardwood floats on top of the subfloor. Floating floor installations require a underpad to be placed on top of the subfloor before installation.

There are two types of floating installation: tongue & groove and click. For a floating tongue and groove installation, a recommended adhesive is applied to the tongue and groove of the floor board to hold the boards together. A click system on the other hand, doesn’t use adhesive. The manufacturer’s patented click system allows the boards to stay together.

If you are still unsure which hardwood installation type is most suitable for your hardwood, your flooring professional can advise you on the best installation method.

Try on a Floor – Review of Shaw’s Virtual Flooring

It can be challenging to visualize how your new floors will look in a room from just a flooring sample. Shaw’s “Try on a Floor” online virtual flooring tool eliminates the guesswork by letting you try on flooring in your own room! We gave it a try with a room in our office and a few job photos. Here’s a few tips and tricks to make the most of this great online tool.

How to take the photo

To get the best photo of your room Shaw recommends the following:

1. Move plants, decorative items and area rugs out of the shot. Avoid mirrors that reflect the floor. (We learnt this lesson the hard way – see if you can spot it!)

2. Take the photo during the day with natural light behind you and lights on to avoid shadows.

3. Set your camera’s resolution on high to ensure a sharp image. (We took photos of the MIRA office with an iPhone 5 and they worked well!)


Upload photos to Shaw

1. To upload photos to “Try on a Floor”, you’ll have to become a member first. Create a new account with your email address or login with Facebook here: https://shawfloors.com/hub/login.aspx

2. Once registered, go to the photo uploader here: http://shawfloors.com/tryonafloor.aspx?mode=uyo. Shaw has a great video demonstration to show how to upload your photos and prepare your floor.

Prepare your floor

1. Define your floor. We recommend doing a quick outline with the Add Area tool. Then zoom in to the photo and do touch-ups with the erase and add area brushes.

2. Create a grid by drawing a line from the one end of the farthest baseboard to another end. Align your floor by adjusting the grid’s rotation and tilt.

3. Change the scale of the grid to match the scale of your room.

Your photo is now ready to try on new flooring options! The process looks confusing but it is very simple. The three steps only took us about three minutes for the office photo and 5 minutes for each of the job site photos.

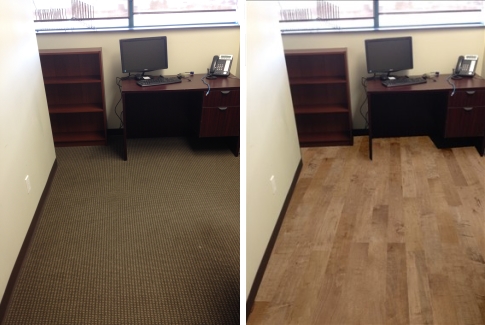
Here’s a before and after of our showroom. Goodbye commercial carpet, hello hardwood floors! (Hardwood style Lewis and Clark, Colour Pacific)

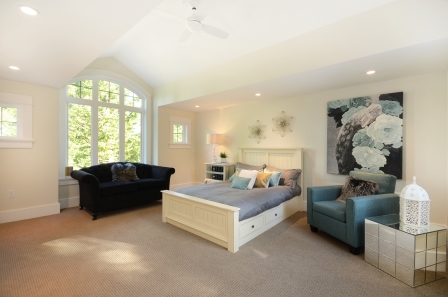
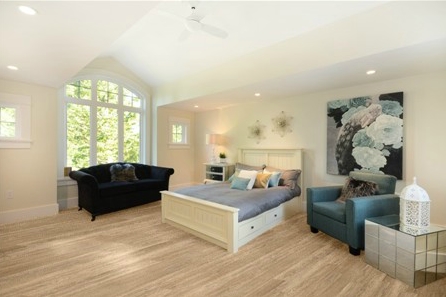
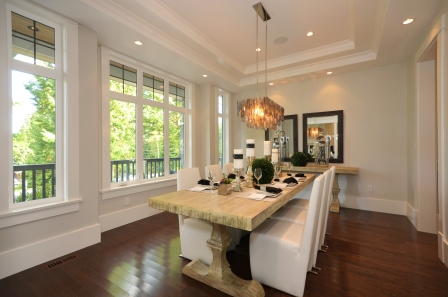
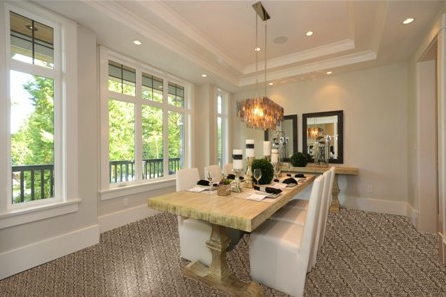
We also tried a few before and after’s with some photos from a recent new build job.

The carpet in this bedroom was replaced with a trendy white oak visual laminate. (Laminate style Cantebury, colour Thyme)

Bedroom original

Bedroom laminate

We swapped out the dining room hardwood with a bold patterned carpet. (Carpet style Caldonia, colour Sesame)

Dining room original

Dining room carpet

Don’t have a camera or time to upload a photo? You can use one of Shaw’s pre-made room scenes instead. You can change the colour of the walls and furniture of the pre-made room scenes to look more similar to your own home.


WCFA ICC Greater Langley Chamber of Commerce Insurance Brokers Association CHOA Greater Vancouver Home Builders Association Better Business Bureau BCAOMA Aviva